


How to Change Your Shopify Theme Without Losing Content
What stays and what goes when you change a Shopify theme, a pre-switch checklist, the steps to publish safely, the SEO impact, and how to update a theme.
Short answer: you change a Shopify theme by adding the new theme in Online Store > Themes, customizing it while it is unpublished, testing it on a phone, and then publishing it. Your products, collections, pages, blog posts, customers and orders stay exactly where they are. What does not carry over is everything that lives inside the old theme: section layouts, theme settings, app blocks and any custom code.
That split is the whole job. A theme switch is not a content migration. It is a rebuild of the presentation layer, and the risk sits in the details you forget to rebuild: the tracking snippet pasted into the old theme file, the app block on the product page, the redirect nobody noticed. This guide covers what changes, a checklist to run before you touch anything, the exact switch steps, the SEO effect, and how updating to a new version of the same theme is a different (and easier) job.
What Stays and What Changes When You Switch
Shopify stores your data separately from your theme. The theme only decides how that data is displayed. So the sorting is simple.
| Stays when you switch | Does not carry over |
|---|---|
| Products, variants, images, prices | Section layout and order on every template (homepage, product, collection) |
| Collections and collection rules | Theme settings: colors, fonts, buttons, header and footer options |
| Pages and blog posts (the content itself) | App blocks placed in theme sections, and app embeds toggled on in the old theme |
| Navigation menus | Custom Liquid, CSS and JavaScript edited into theme files |
| Customers, orders, discounts | Tracking or widget snippets pasted into theme.liquid |
| URL handles and existing redirects | Theme-specific features: mega menus, sticky bars, comparison tools, size chart blocks |
| Apps installed on the store (the app itself) | Template assignments, such as an alternate product template for a product type |
One nuance on pages and blog posts. The text and images stay. The way they look does not, because the new theme brings its own page and article templates. A long-form blog post that read well in the old theme can look cramped in a new one, so open a few of your most visited posts in preview.
Before You Switch: A Checklist
Run this list before you hit Add theme. Most of it takes under an hour on a small store and it is what separates a clean switch from a week of firefighting.
- Duplicate your live theme. In Online Store > Themes, open the actions menu on the live theme and choose Duplicate. If anything breaks, you publish the duplicate and you are back where you started. Your old theme also stays in the library after you publish a new one, so a rollback is one click.
- List every app that renders something on the storefront. Reviews, upsells, bundles, size charts, wishlists, subscription widgets, announcement bars. Open the old theme editor and note which ones are app blocks on which templates, and which are app embeds. You will re-add each one in the new theme.
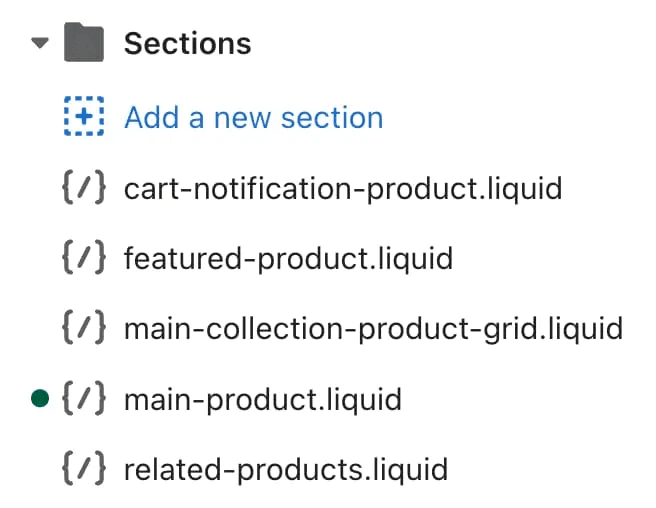
- Find your custom code. In the theme code editor, files you edited show a dot next to the file name. Copy those changes into a text file. Also search theme.liquid for pasted scripts: analytics, chat widgets, pixels, verification tags.
- Screenshot your key pages. Homepage, a top collection, your best-selling product page, cart. Desktop and mobile. You will want a reference when you rebuild, and a baseline when you compare conversion later.
- Record your baseline numbers. Conversion rate, add-to-cart rate, mobile conversion rate, and page speed on the homepage and a product page. Without a baseline, you cannot tell whether the new theme helped.
- Check URLs and redirects. Product, collection, page and blog URLs are controlled by Shopify, not by the theme, so they do not change when you switch. Still, export your current redirects and list your top landing pages from Google Search Console so you can spot-check them afterward.
- Pick the timing. Do not switch in the two weeks before a peak sale. Switch when traffic is steady, so a dip in the numbers points at the theme and not at a campaign.
If you have not chosen the new theme yet, do that first. Our best Shopify themes roundup compares the main options, and the fastest Shopify themes is worth reading if page speed is the reason you are switching. If you are leaving Horizon, see Horizon theme alternatives.
How to Change Your Shopify Theme, Step by Step
The steps below use the current Shopify admin. Menu labels shift now and then, so if a button has moved, look for the same action in the theme library.
Step 1: Open the theme library
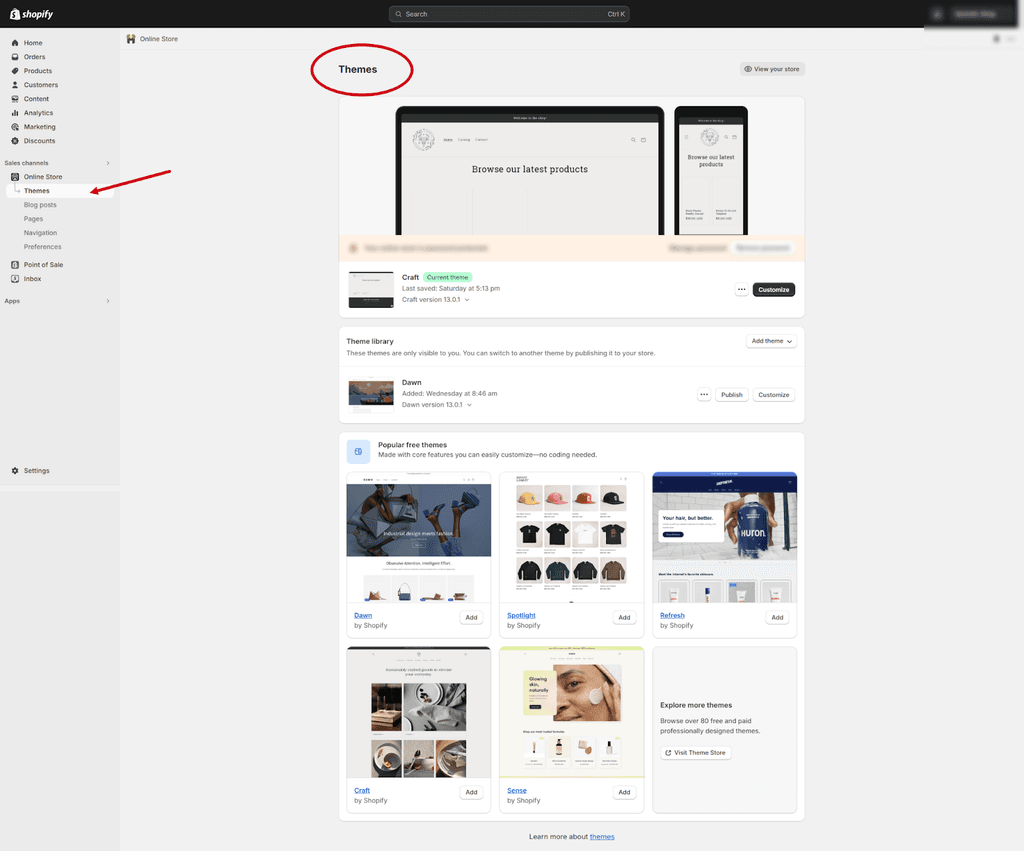
In your Shopify admin, go to Online Store, then Themes. You will see your current (live) theme at the top and your theme library below it. Every theme you have added but not published sits in the library.
Step 2: Add the new theme
Use the Add theme option in the library. You have three common routes. Pick a theme from the Shopify Theme Store, which adds it to your library. Upload a zip file if you bought a theme elsewhere or have a file from a developer. Or connect a theme from a Git repository if you work with a developer. A new theme always lands in the library unpublished, so nothing changes for your shoppers yet.
If you are buying from the Theme Store, our themes catalog lists each eComX theme with its niche, price and Lighthouse score, so you can match the theme to the store type before you spend anything.
Step 3: Customize while it is unpublished
Open the actions menu on the new theme and choose Customize. This is the theme editor, and everything you do here is invisible to shoppers until you publish. If you have never used it, our theme editor guide walks through sections, blocks and settings.
Rebuild in this order, because it mirrors how buyers move through the store:
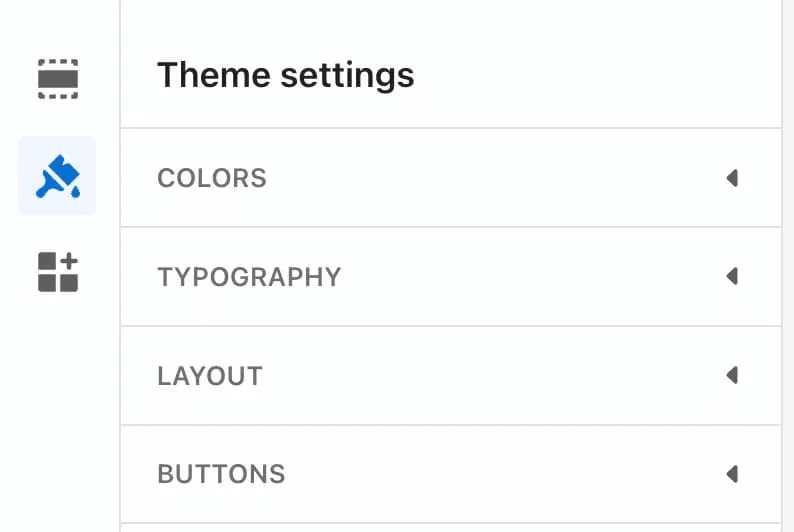
- Theme settings first: logo, colors, fonts, button styles, cart type. This is where your brand shows up on every page.
- Product page next. It carries the highest buying intent, so rebuild it before anything else. Re-add your review app, size chart and any bundle or upsell blocks.
- Collection pages, then the cart.
- Homepage last. It gets the most attention in a redesign and does the least direct selling work.
- Header, footer and navigation. Confirm your menus are attached and that nothing important dropped out of the mega menu.
This order is deliberate. Most store owners start with the homepage because it is the visible part. Buyers decide on product and collection pages. Get those right first and you can ship the homepage as a lighter version. For a wider view of how to structure the whole storefront, see how to design a Shopify website.
Step 4: Re-add apps, tracking and custom code
Go back to the list from your checklist. For each app, check whether it needs to be added as a block in the new theme editor, toggled on under app embeds, or reinstalled from within the app's own settings. Paste your tracking snippets and custom code where they belong in the new theme. Do not copy whole old files over new ones. Theme code differs between themes and between versions, and an old file can break a new one. Copy only the lines you wrote.
Step 5: Preview and test on mobile before you publish
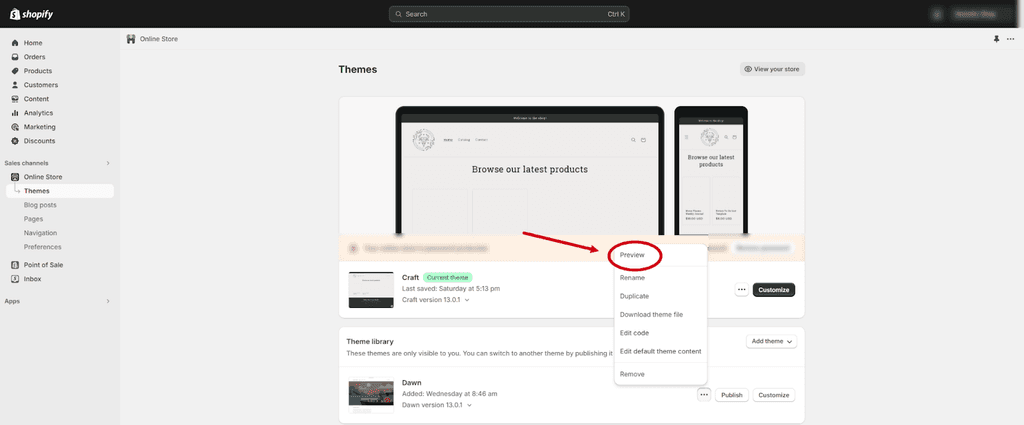
Use the Preview option in the actions menu to see the theme with your live data. Over 70% of Shopify traffic is mobile, so test on a real phone first, not just a narrowed desktop window. Share the preview link with yourself and open it on your phone, then run the full buying path:
- Open the homepage, then a collection, then a product page.
- Select a variant, check the image gallery changes, and add to cart.
- Open the cart, change quantity, apply a discount code, and go to checkout.
- Check that your app blocks load and that no section is empty.
- Check navigation, search and filtering on a collection with many products.
- Test one product with no reviews and one with a long title. Edge cases break layouts.
Also run a speed test on the preview. If you switched for performance, confirm you actually got it. Our speed score guide explains what the number means and what moves it.
Step 6: Publish
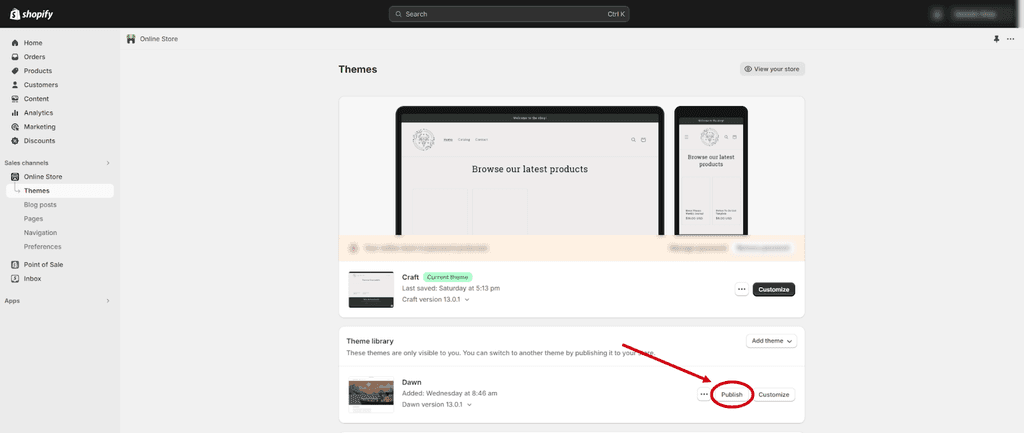
When the preview passes, publish from the actions menu or from the Publish button in the theme editor and confirm. The new theme goes live and the old one drops into the library as unpublished. Place a test order or at least run through checkout once on the live store, then watch the numbers from your baseline over the next one to two weeks.
You do not need to put the store behind a password for a normal theme switch. Because the new theme stays unpublished until you publish it, shoppers never see the work in progress. A password page only makes sense if the change goes beyond the theme, such as a replatform or a full rebrand. See how the Shopify password page works if you need that.
Does Changing Your Shopify Theme Affect SEO?
It can, but less than most people fear, and almost always for reasons you can control. The idea that a theme change breaks your URLs is mostly a myth on Shopify. Product, collection, page and blog URLs follow Shopify's structure, and the theme does not rewrite them. If your handles stay the same, your URLs stay the same.
What a theme does change is how those pages are built. That is where SEO movement comes from:
- Heading structure. If the new theme wraps your product title in an H1 and your collection title in an H1, good. If it uses the logo or a decorative banner as the H1, you lose a clear signal. Check the source of your top pages.
- Structured data. Product pages should still output product, price and availability markup after the switch. Run a few product URLs through Google's Rich Results Test.
- Page speed and Core Web Vitals. A heavier theme with more JavaScript can slow your pages and hurt rankings. A leaner one can help. Measure before and after.
- Mobile layout. Google indexes the mobile version, so a theme that hides content on mobile can drop text out of the index.
- Internal linking and navigation. A new mega menu or footer changes how link equity flows to your category pages. Keep your key collections linked in the main navigation.
- Content that disappears. If the old theme showed a collection description or SEO text block and the new one does not, the text leaves the page. Re-enable it or the rankings it supported may slip.
How to limit the SEO risk
- Keep all handles and URLs unchanged. Do not rename products or collections during a theme switch.
- Compare page source before and after on five pages: homepage, a collection, a product, a blog post, a page. Check title tag, meta description, H1 and structured data.
- Set up a URL redirect for any URL you do have to change. Use the URL redirects tool in the Online Store navigation settings.
- Submit your sitemap again in Google Search Console after publishing, and watch the Pages and Performance reports for crawl errors and a ranking drop on your top landing pages.
- Expect some fluctuation. A short wobble after a switch is normal. A drop that continues for several weeks points at something you can fix, usually a missing heading, missing text or a speed regression.
Themes submitted to the Shopify Theme Store have to meet Shopify's review requirements, which cover basics such as metadata and canonical tags. That raises the floor. It does not guarantee speed or a good mobile layout, so test those anyway. If SEO is the main driver of your switch, our guide to the best Shopify themes for SEO covers what to look for.
Updating to a New Version of the Same Theme
This is a different job from switching. When your theme developer ships a new version, you are not changing themes. You are moving to a newer copy of the same one. The question is what comes along. The answer depends on where your customizations live.
What carries over and what does not
Theme editor work is stored in JSON files inside the theme. Edited code is stored in Liquid, CSS and JavaScript files. They behave differently during an update.
| Where your change lives | Typically carries to the new version | What to check |
|---|---|---|
| settings_data.json (theme settings: colors, fonts, cart type) | Yes, it is preserved in the new copy | Settings introduced in the new version will have defaults |
| Template JSON files (index.json, product.json, collection.json, page.json, blog.json, article.json, cart.json) | Yes, your section order and block settings are kept | Sections removed or renamed in the new version |
| Edited section, snippet, layout and asset files (Liquid, CSS, JS) | No, treat these as needing to be re-applied | Every file marked with a dot in the code editor |
| Code that an app injected into theme files | Not reliably | Reconnect or re-run the app's theme setup |
Treat that table as a guide, not a guarantee. Shopify's update flow is designed to keep your sections, blocks and settings, but code edits in non-template files do not move automatically, and the safest assumption is that you re-apply them by hand.
How to update without losing customization
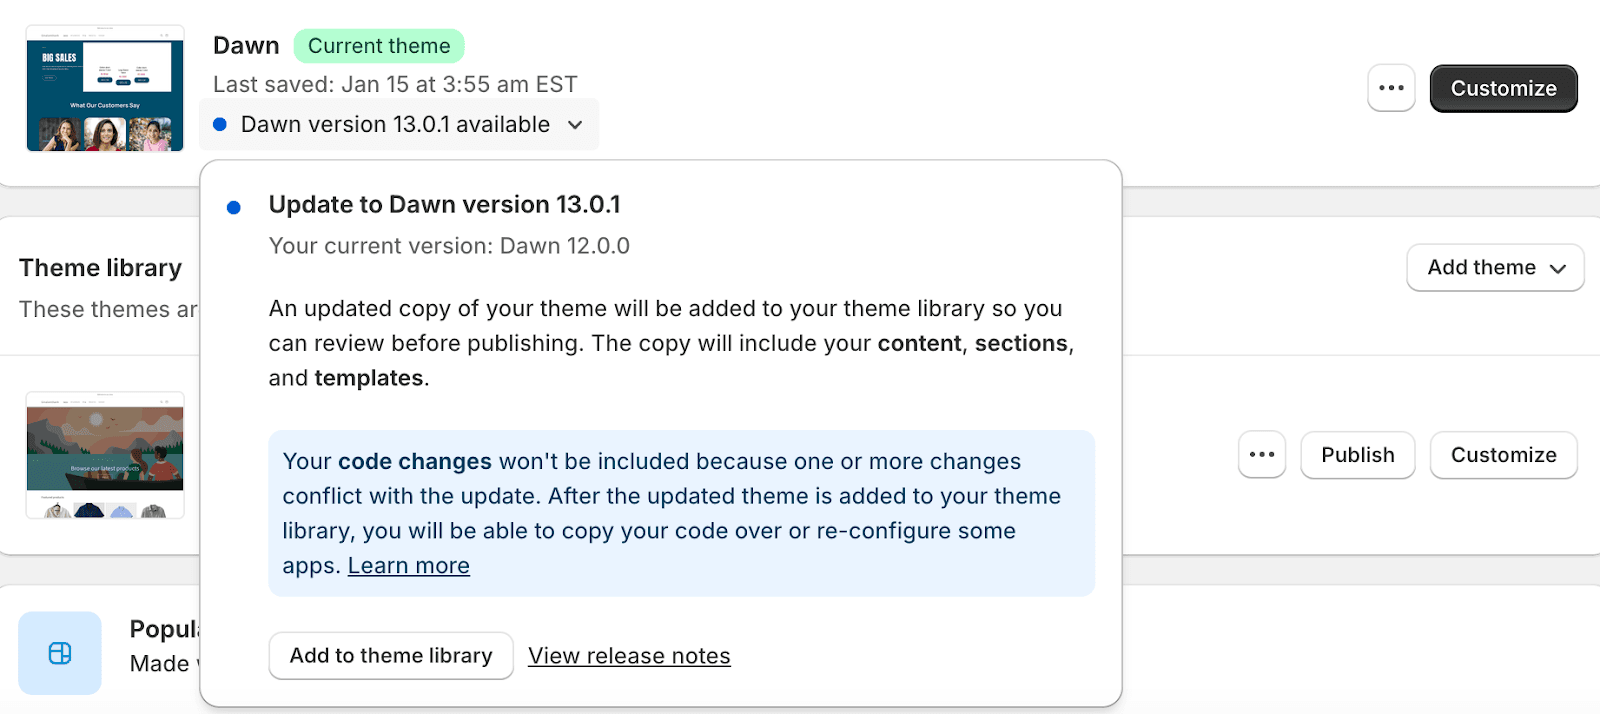
- Look for the update notice. If you installed the theme from the Theme Store, Shopify shows a message in the theme library when a new version is available. Selecting it adds the new version as an unpublished theme. Your live theme is not touched.
- Duplicate your current theme first. This gives you a backup and a code reference.
- If you uploaded a zip file, there is no update notice. Download the new version from the developer, duplicate your current theme, then upload the new zip. You will do the transfer manually.
- Open the new version in the theme editor. Check which settings and sections came across. If the update flow did not preserve them, copy the JSON files over (see below).
- Re-apply your code edits. In the old theme's code editor, files with a dot next to the name were changed. Open them one by one and copy only your edited lines into the matching file in the new version.
- Preview, test on mobile, and publish.
To find exactly what you changed, open the same file from the old and new version in a diff tool such as diffchecker.com. Paste the old file as original and the new one as changed. Anything you added appears as a difference you can port across. Where the vendor changed the same area, you will have to merge by hand. When the edits were built by a developer, ask the same developer to port them. It is faster and safer than doing it yourself.
Copying JSON files between versions
If the editor settings did not come across, the JSON files can be copied. settings_data.json holds your theme-wide settings. index.json holds your homepage. product.json, collection.json, page.json, blog.json, article.json and cart.json hold the default template for each page type. Copying these across can save hours, but it is not guaranteed to work, because section names and setting IDs can differ between versions. Test every template afterward, and keep the copy of the old file in case you need to revert.
Third-party updater apps exist for some theme vendors, but the supported themes and the plans that preserve code changes vary, so check what the app covers before you pay for it. Online Store 2.0 is required for in-admin updates. If your theme is an older vintage without JSON templates, there is no update path, and a switch to a current theme is the practical route.
When a Switch Pays Off, and When It Does Not
A new theme is a business decision, not a refresh. In our store optimization and client work, the switches that paid off had a specific reason: the old theme did not carry the buyer's decision path for that store type. A clothing store needs fast variant selection and strong imagery. An electronics store needs comparison and specs near the buy button. Beauty buyers want proof that the product works. A generic multipurpose theme has to guess; a niche-specific one encodes the answer.
That is what we build into eComX themes. Blum is for clothing, jewelry and accessories. Electro is for electronics. Shine is for beauty and wellness. Normcore is for home stores with large catalogs. If you are coming from Dawn, our Dawn comparison shows what changes at the structural level, and our Dawn theme review covers its limits.
Do not switch just because the design feels old. Switch when the numbers or the buyer path tell you the theme is the constraint. Then do it in the order above: back up, rebuild product and collection pages first, test on mobile, publish, and watch your baseline.
More from the blog
Ready to convert more?
Stop leaving revenue on the table.
Your theme is the highest-leverage conversion tool you have.